 back |
 home |
 next |
Lettering
The Lettering Tool
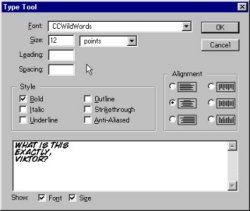
One of the peculiarities of Photoshop is it adds a new layer for every new block of text -- which can sometimes be a disadvantage. Fortunately in this case it is not, as we can place the text on the page with relative freedom. For comic balloons you generally select Center formatted text; don't forget to make sure the text block will actually fit within the allotted balloon. If you're doing the art at 100% size, with the intention of reducing it later, select 12-point type for your text. If you're lettering at the final output size though, 10-point is fine. Currently most companies use hand lettered fonts, like Comic Craft's Wildwords.
|
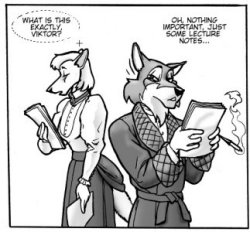
Once you've placed the lettering, you have to create the balloon
outline. You can freehand the shape of the balloon with the Lasso
tool, but my preference is to use the Marquee Selection tool, set
on ellipse. If you press the <alt> key while dragging your
selection, your ellipse will grow in size from the center outwards. If
you use the Marquee Selection tool alone, the ellipse will grow
from a corner. It's useful to know both ways of doing this.
When your balloon is the desired size and shape, make a layer just under the lettering layer. Use the Edit => Stroke command with black as the foreground color, then use Edit => Fill => Background Color, and make sure the background color is set to white. |
| this tutorial | ||||
 back |
 home |
 next |
||
| Tutorials | ||||
 back |
 Home Page |
 next |
||


